Adding Fields
You may find that you want certain fields to appear on a screen, form or message template that are not displayed by default. You can either add fields that already exist in the system, or create new custom fields and add them. Alternatively, you can import fields from Excel or previously saved HTML files.
Before you start
Before working in Designer, we strongly recommend that you undertake appropriate training.
Exercise caution when using the Designer to modify screen designs which have been customized by Alemba Professional Services. Contact your Alemba account manager if you are uncertain about whether your actions will impact these customizations.
You must have Designer selected in your General Access security role before you can use this option.
If the field you want to add does not already exist in vFire Core, you need to create it first.
If you want to use a field that is held in an Excel or HTML file, you need to import it first.
It is important to know where to add a field. Fields created within a task can only be used in that specific task. To pass information from one task to another, the field must be added to the parent request.
To maintain an audit trail of changes made to screens, forms and message templates, Designer must be selected in the Auditing window.
-
 Display the Designer window if it is not already visible on screen.
Select
 and then Admin.
From the submenu, select Designer.
This window consists of three tabs
 . They display different views:
Find a Screen Can be used to search for and work with specific screens, forms or message templates, as well as create new in-house screens View screens Displays details of currently selected screens and is used to modify screens Skins Enables you to create and modify skins for your vFire Self Service Portal(s) -
Find the screen, if it is not already displayed.
- Make the Find a Screen tab uppermost, if necessary
 .
. - Select the entity type (such as Call) from the left pane. The table displays the configurable screens, templates and forms associated with the selected entity, with the first one highlighted. Items you cannot create or configure are not included. The number of screens associated with the selected entity is displayed in the bottom right hand corner of the window
 .
. - Filter and sort the screens if you wish:
To filter the number of entries displayed on the table, use the fields at the top of the window: - Select the screen, template or form you wish to work with, and select
 at the bottom of the window. To select multiple screens, select one and hold down the Shift or Ctrl key and select the rest.
 - The window changes and if you look in the top left corner, you will see that the View Screens tab is now uppermost.

The left pane on this tab contains an alphabetical list of the main entity types in vFire Core (Agreement, Bulletin, Call, and so on) with which screens are associated.
The main pane has a set of filters across the top, beneath which there is a browse table listing the screens, templates or forms for the selected entity, and their details.
Screen Name Type a name and select  .
.Screen Set A drop-down list of all screen sets. Each entity type has a standard screen set which has the same name as the entity. For example, the default screen set for calls is Call Screen Set.
Certain entity types, such as Organization, Person, Agreement and Location, only have default screen sets. Others, such as Call, Request, Task, CMDB item, Contract and Knowledge can have custom screen sets and these will appear on the list. Only one Details screen and one Submission screen can exist per screen set. You can have multiple message templates and service desk forms in the same screen set.
Screen Design A drop-down list of available designs To sort the information, click on the required column heading (such as Name). The entries are displayed in alphabetical order for that column.
You can also view a history of changes to a screen, create new screens, delete and rename screens and view deleted screens from this window.
You can select the Find a Screen tab again if you wish to select a different screen.
- Make the Find a Screen tab uppermost, if necessary
- Open the screen, if it is not already displayed. (Having selected the screen, select .)
- Make the Add a Field tab in the left hand pane uppermost, if necessary
 . The pane lists the fields and layout elements available to add to the current screen.
 - In the Data fields for field, select the screen set to which the field belongs from the drop down list. This list usually includes the following values:
- the name of the screen set(s) associated with the currently opened screen
- For Task or Approval screens, the Request screen set linked to the screen
- For User Survey screens, the Call screen set that is linked to the screen. The fields can only be added as read-only fields.
- For message templates, the Sender and Recipient screen sets. You can select one of these to add fields relating to person data (such as Full Name, Email ID and Time Zone).
- Other Screen Sets
- If you select a screen set associated with the current screen, you can select one of the following filter options to narrow the list of fields associated with the screen set:
- If you select Other Screen Sets, you can search for custom fields using the
 button. All Knowledge screen sets are grouped under Base Knowledge. All Task screen sets are grouped under Base Task. All Report screens are grouped under Report, Report Schedule and Generated Report.
 - Find the field you want to add to the screen. You can sort the fields by selecting a column heading. The available fields are listed in the table in the left pane. (You may like to adjust the column widths to see all of the columns.) The following information is displayed:
- Select the field you want to add to the screen, and drag it onto the screen. Position the field where you want it to appear. An arrow with a small box, with the name of the field in a faint shaded area beneath it
 indicates that the field can be dropped in this area. A circle with a line through it indicates that you cannot position the field here.
 -
Select
 at the bottom of the window to save changes to the current screen or
  to save the content as an HTML file. The file can then be edited with any HTML editor. However, you should be aware that any instability as a result of modifications made outside the Designer is not covered by your Alemba support and maintenance agreement. When you export a screen, form or message template, images embedded on to the template are not exported. When you load an exported screen, form or message template into vFire Core, you will need to re-add any images.
  saves changes to all open screens. If auditing is turned on, the Change Reasons window will display, prompting you to add a change reason.
 - If you wish to undo the addition, select the
 button in the top right corner of the window. Save the changes once more.


| All fields | Select this option to display all available fields |
| Custom fields | Select this option to see only the user-defined fields you have added |
| Linked Fields |
Select this to view the fields referenced by (linked to) the current screen through an entity Q/D field. For example, a Person Q/D field displays the Person Details fields such as First Name, and Surname. Linked fields can only be added to screens as read-only fields. Select the field on the screen design in the main pane. The window changes. Select the Add a Field tab in the left pane once more to see that this button is now active. |
| Display Title | the display name for field shown in the application when the field is referenced |
| Database Name | the database name of the field (by default, is set to the display name in uppercase, with spaces converted to underscores) |
| Last Modified Date | the date and time when the field was created, linked to a screen set, or any field settings changed |

The Call Details, Request Details and CMDB Item Details screens may be used as templates. If you insert a field into an area of the screen only shown when the screen is in ‘template mode’, the fields will not display if the screen is being used as a standard Details window.
When you insert a custom field into a message template, the name displayed between the [square brackets] is not the database name that displays in the list of available fields. To view the database name of the field, select the field and view the Display Name in the Field Settings tab 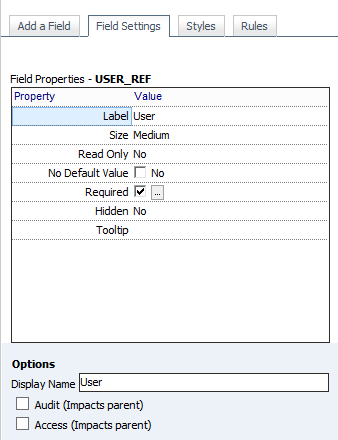 .
.
If you insert an extensible field which was not already associated with the screen set for the current screen, the field is linked to the screen and added to the Custom fields associated with the screen set.